
Last update: 25 June 2019
This page of The Sinking City Tipps includes the walkthrough of the Quid Pro Quo main case. You have to determine who kidnapped professor Harriet Dough. This means visiting new places, and Reed will also make first contact with one of the secret organizations in Oakmont. In the final part of the case you will have a choice, and it will affect the course of several successive scenes. The completion of the investigation, however, is the same for both options.
- View the history of robberies in the police archive
- Fish market and meeting Anna
- Explorethe Fish Market
- A visit to the University
- Viewing the archive in the city hall
- George Cavendish’s Apartment
- Meeting Cavendish – an important choice
- Option 1-cooperation with Cavendish
- Option 2 – Murdering Cavendish
- Meeting with Fred and reporting to Throgmorton
View the history of robberies in the police archive
This case starts automatically after the Lost at Sea investigation. You immediately receive the first two pieces of evidence – Throgmorton’s Task, and The Fate of the Expedition.
The second of these tracks will help you start the new case. It is necessary to obtain information about previous attacks like the one on the members of the expedition. Get to the Oakmont Police Department and go to the archive.
After confirming the search, you should receive police Report No19-0451.
Fish market and meeting Anna
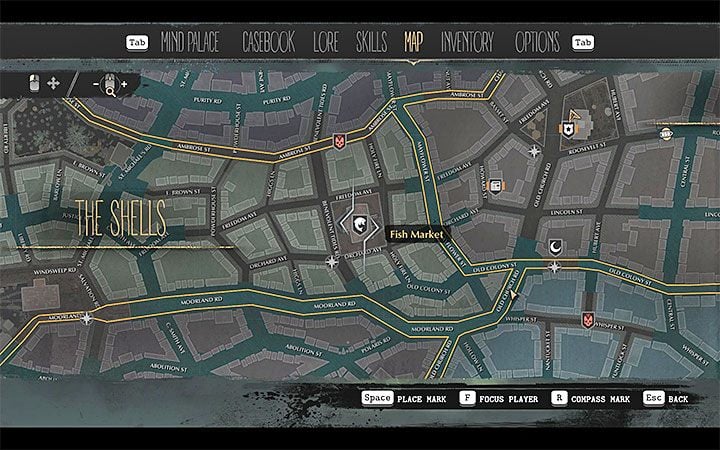
You will learn from the report about the EOD organization, as well as the need to visit the Fish Market. It does not immediately appear on the world map. You must reach the Eastern part of the Shells district visible in the screenshot above.
When you reach the Fish Market, find Anna, and talk to her. Express a desire to join this organization and meet with the highest ranking members. You will receive a new task and unlock a new piece of evidence – Anna’s Request.
Before working on the assignment, open the Mind Palace. Combine the clues – Oakmont is starving and EOD is giving away fish – you unlock a deduction – The EOD helps prevent famine.
During your stay at the fish market you can also enter conversations unrelated to this investigation with several other characters and unlock the Open House side investigation.
Explorethe Fish Market
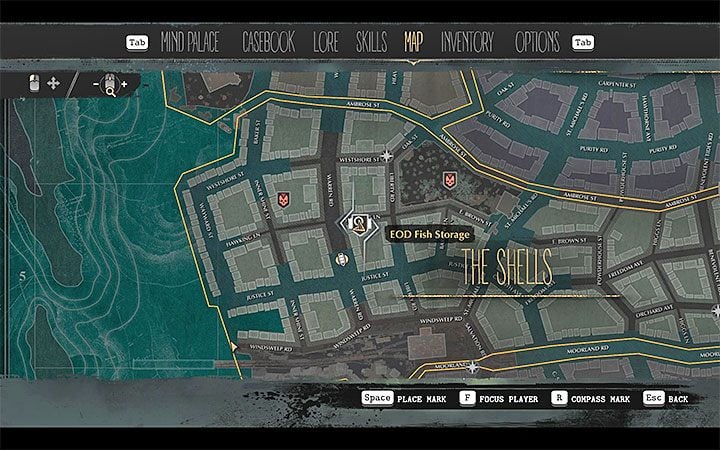
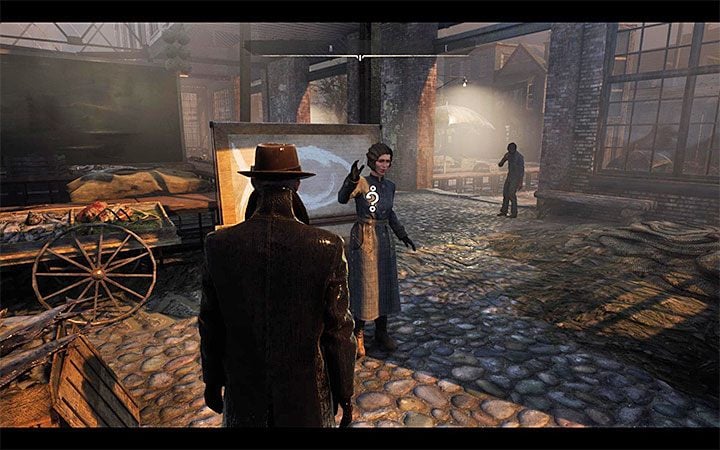
Your new destination is the EOD Fish Storage. The location of EOD Fish Storage – western part of Shells district. The warehouse is located on Hawking Lane between Warren Road and Liberty Road. Talk to Daryl Grimes, who’s standing at the entrance to the warehouse. Say the password received from Anna (I Serve the sea) to be let inside and get the Key to the Fish Storage. Exhaust also all the other dialogue options – you will unlock The Guard’s Testimony.
Go to the warehouse and start exploring it. You have to watch out, because at some point monsters will appear in the warehouse. In addition to the small monsters known from previous major cases, there will also be larger spitting creatures. Try to attack them from a long distance and run on to the sides to avoid being hit with poisonous projectiles.
After clearing the storage of monsters, explore it:
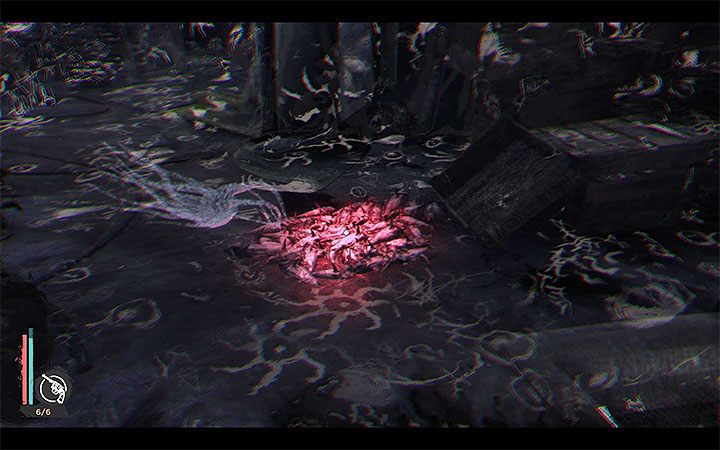
Go back to the basement and inspect the area next to the stairs. In the place indicated in the picture you can once again use the Mind’s Eye. You will discover an illusion wall. Let the characters match. Go into the hidden rooms and see the instruments of torture.
Go to the second floor and continue the research of the magazine:
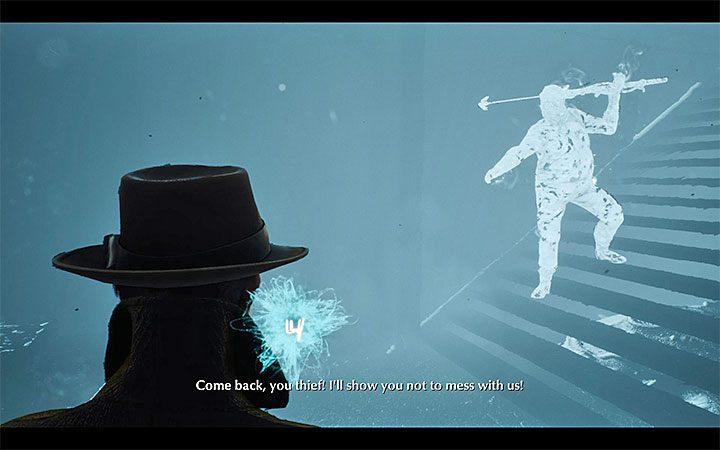
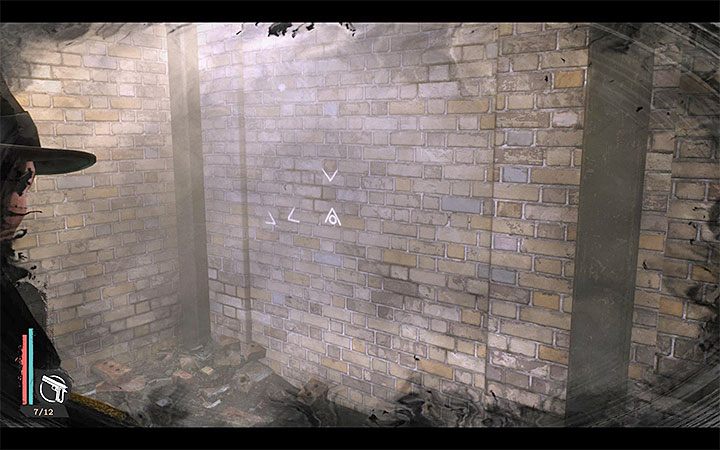
Now you can find the blue cloud to proceed with the retrocognition. Discover all the interactive areas. The correct sequence of events:
You determined that the burglar used an unknown substance to poison the fish, but during the break-in knocked over one of the boxes and was driven off by Grimes. Talk to Daryl Grimes. In the course of this conversation, you will have a small choice to make:
You explored the storage in 100%. You will receive a new piece of evidence – The Events in the Fish Storage and The Guard’s Plea. Open the Mind Palace. Connect clues: A mention of a professor) and Lab Flask. You unlock the deduction: The Poisoner and the University.
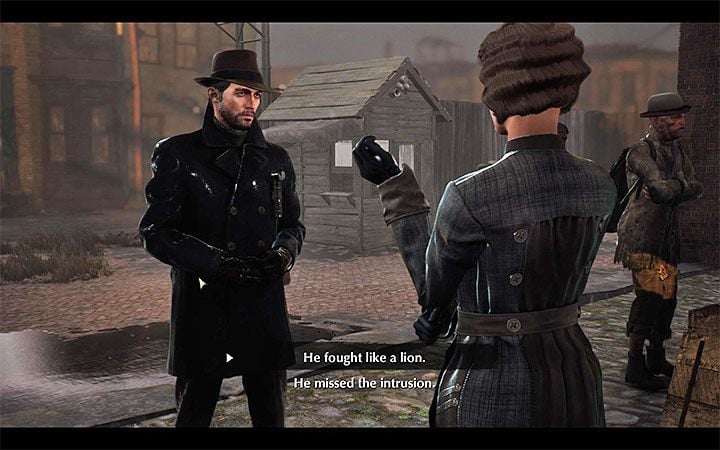
Go back to the Fish Market to report to Anna. During the conversation you need to make a decision (the screenshot above) – you can lie that Grimes bravely defended the storage (he will remain on the post) or tell the truth that he missed the moment of breaking in (he will be „fired“). Regardless of which option you choose, exhaust all dialog options.
A visit to the University
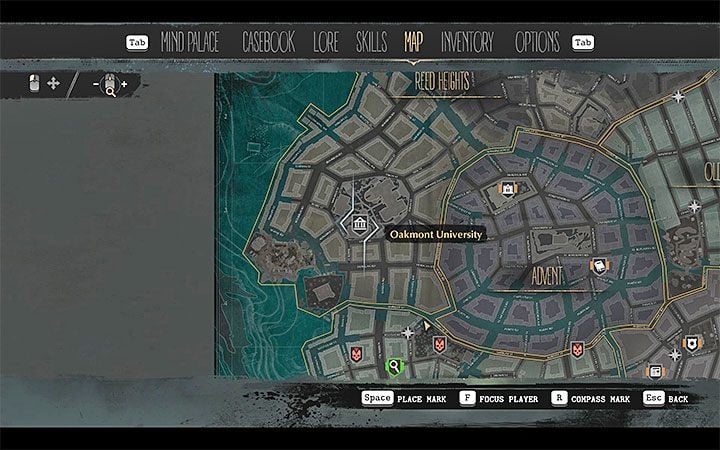
Your new destination is Oakmont University. It is located in the northern district of the city – Reed Heights. Discuss all topics with the man standing in front of the (closed) main building of the University.
Go to the newly added location on the world map – Department of Medicine. Upon arrival, start with a discussion at the reception with Samuel. You will have to satisfy the request of Samuel (The student’s Request) and get rid of the monsters from the basement in exchange for the analysis found in the warehouse fish mysterious substance. You will receive A Key to the Lab.
On the wall next to the reception you will find a poster (EOD is Banned!). Behind Samuel you will find ammunition and a locker with a minor loot. Use the key and go down to the basement. In the lab there are small monsters and big creatures spitting out projectiles. If you want to, retreat near the stairs, because the monsters can not overcome this obstacle.
There’s also a big red button in the basement. It’s not about this investigation, it’s about unlocking the Reanimator trophy. Pressing this button several times will „release“ a huge monster that you can try to kill. This fight is described in more detail in our trophy Tipps. Do not use the button if you do not have enough first aid kits and ammunition.
In the basement, in addition to the above button you can also find:
Go back to Samuel and tell him you’ve cleared the basement. He will immediately analyze the substance from the laboratory flask. Ask all questions about the identified poison as well as about the two professors being in the circle of suspects. You will receive The Key to the Second Floor.
Find the door leading to the floor and start exploring the surroundings:
Open the Mind Palace. Connect clues: George Cavendish made a spare key and Westerbrook has access to the poison – you unlock the deduction: The poison thief.
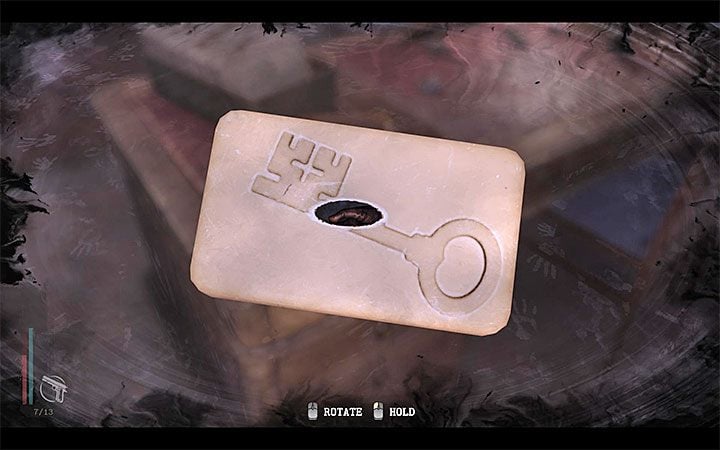
Do not turn off the Mind’s Eye, as you may begin to follow the signs (omens) symbolized by the Professor’s silhouette. Get to the locked room and destroy the padlock with the help of melee weapons. In the pantry, inspect the display case of laboratory flasks. Among them, you’ll find ricin. You should have completed this building in 100% by now.
Viewing the archive in the city hall
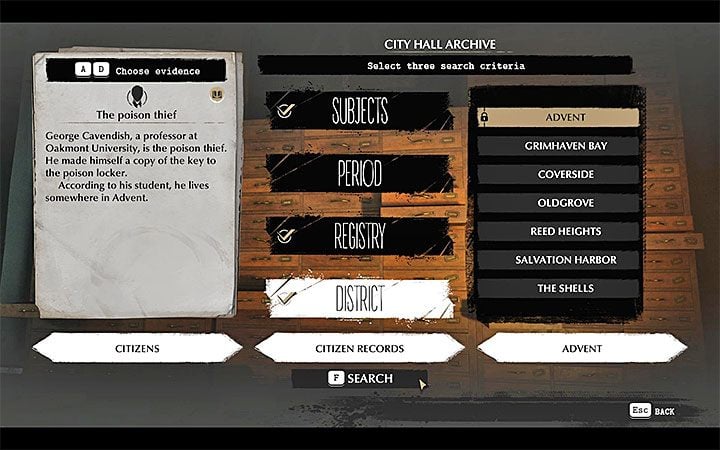
Your new task is to establish where does Professor Cavendish live, and so you need to visit the Oakmont City Hall in the Advent district. Upon arriving there, talk to the front desk clerk – you may be irritable or not. Let’s go to the archive room.
You will receive George Cavendish profile with his residence address.
George Cavendish’s Apartment
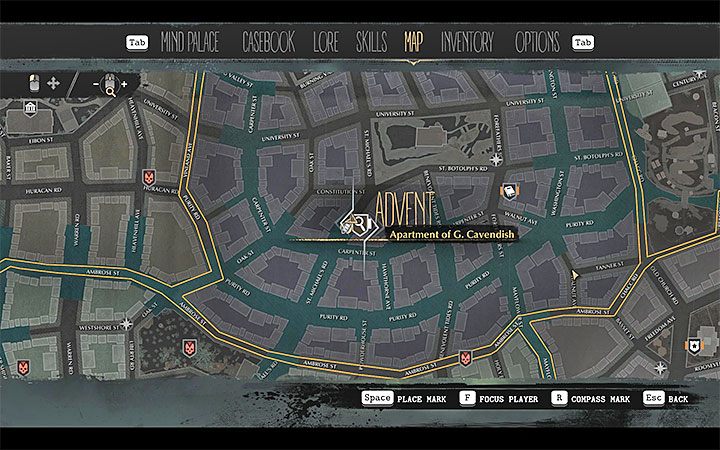
Apartment of G. Cavendish is located in the Advent district. This is Michael’s Road, between Carpenter Street and Constitution Street. The entrance to the residential area is close to the flooded part of the street. Go to the second floor. Take Tag from the Baby Carriage. Use melee weapons to destroy the padlock and get into the apartment ? 2.
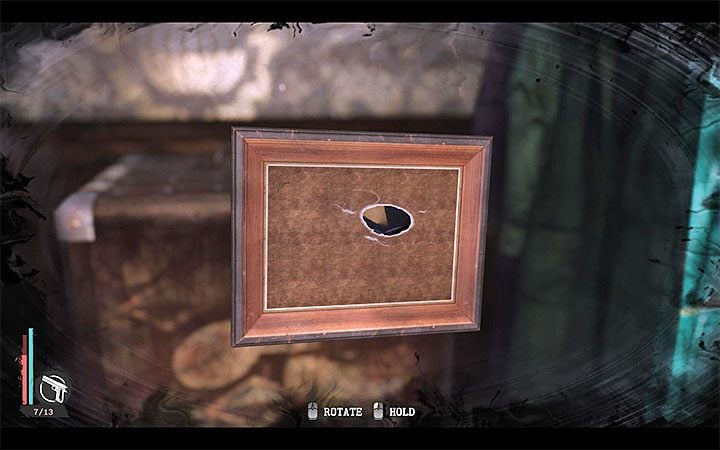
Explore the apartment:
Enter the blue cloud to begin the retrocognition. Here is the correct order of events:
You will learn that Anna was married to Professor Cavendish and that because of disagreements she ran away from George with her child. The apartment is 100% investigated.
Meeting Cavendish – an important choice
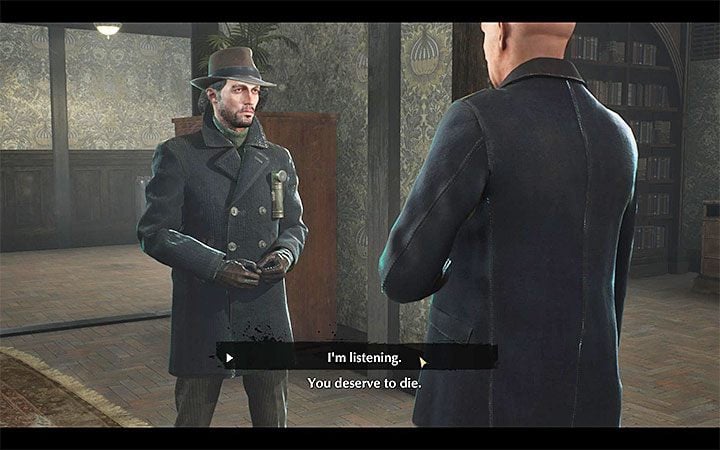
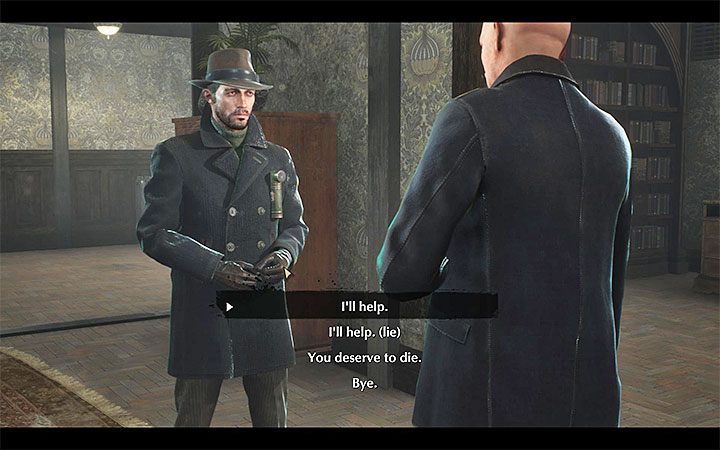
Once the retrocognition is complete, a a cutscene will start and George Cavendish will appear in the apartment. There is an important choice for you to make – the moment of the decision is shown in the screenshot above. Meeting with Cavendish may have two endings:
Option 1-cooperation with Cavendish
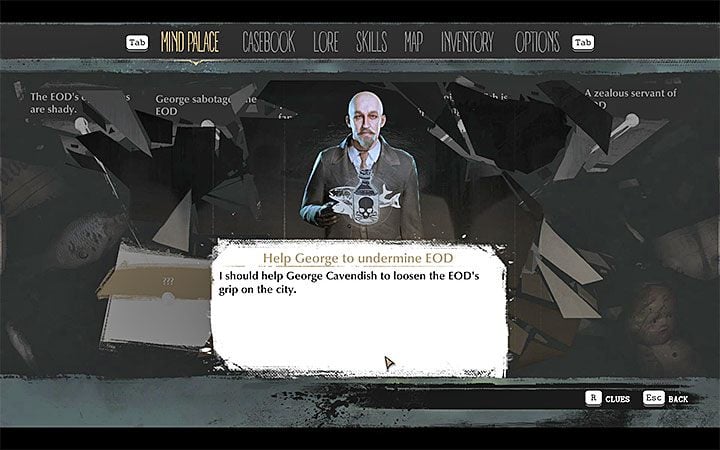
After hearing Cavendish’s arguments, you will have time to think about his proposal. You immediately unlock some evidence – Cavendish Family Disintegration. Open the Mind Palace. You want to reach the conclusion that the activities of the EOD are harmful and that you need to help Cavendish to destroy them at any cost.
Talk to Cavendish again. You have three options:
Go back to the EOD Fish Storage. If you reporten on Daryl Grimes before, you can talk to him before you go into the storage.
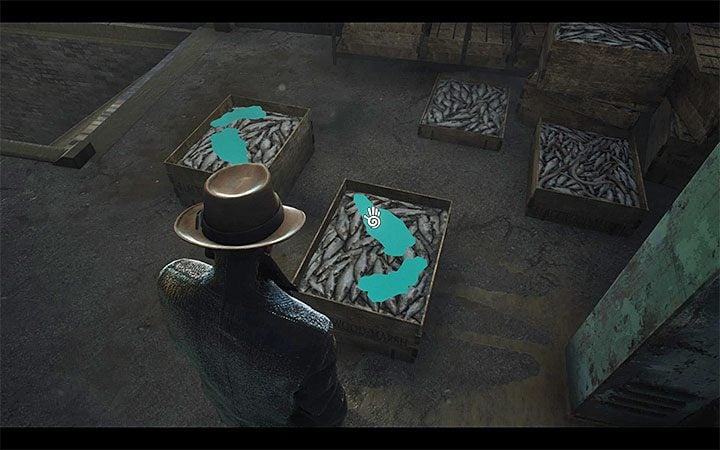
In the warehouse you need to get to five boxes of fish – an example is shown in the screenshot above. Interact with them. You will another pieceof evidende: I dosed the fish with the ricin.
Exit the warehouse and get to the nearby intersection of Hawking Lane and Liberty Road. Talk to George Cavendish. You will learn from him about Fred (George’s Contact in EOD) and you will learn the secret password.
Option 2 – Murdering Cavendish
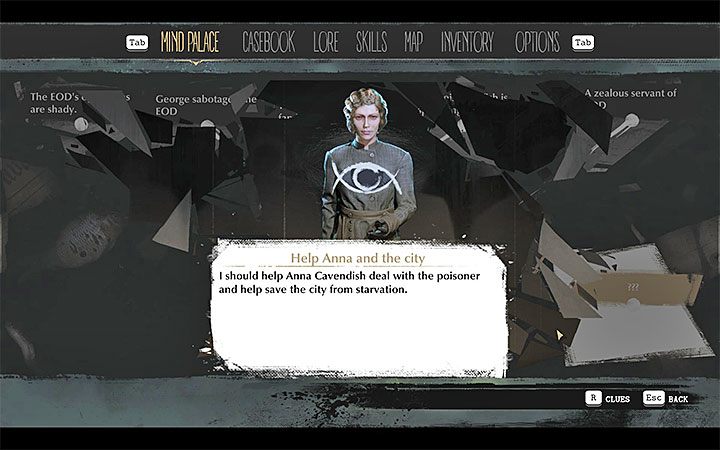
You immediately unlock new pieces of evidence: Cavendish Family Breakup and I killed George Cavendish. Before you leave the apartment, use the Mind Palace. You want to reach a conclusion that the EOD is the „good side“ of the dispute and that they should be supported.

Go back to the fish market to tell Anna to hunt down and murder Cavendish. You will receive an invitation from her to meet the aforementioned Maurice (a high-ranking EOD member) in the basement. The descent to the basement is in the market, to the left of the place where Anna stands.
You can also mee with Anna if you agreed in advance to cooperate with Cavendish, but want deceive him. In this situation, Reed will report on him, and EOD will learn about Cavendish’s plans.
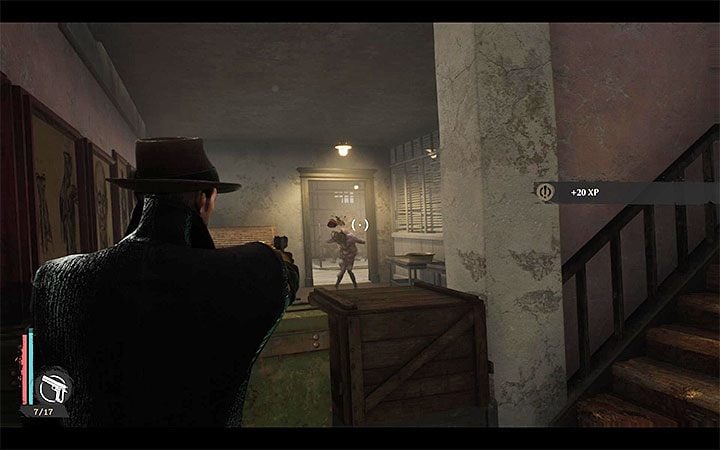
In the basement, you will find a chest with minor loot. Prepare your weapons, because three men from the last room will attack Reed as soon as he enters their field of vision. Shoot them. You will find a note (Note to Maurice) on one of the opponents, which is proof that the EOD wanted to get rid of Reed.
Meeting with Fred and reporting to Throgmorton
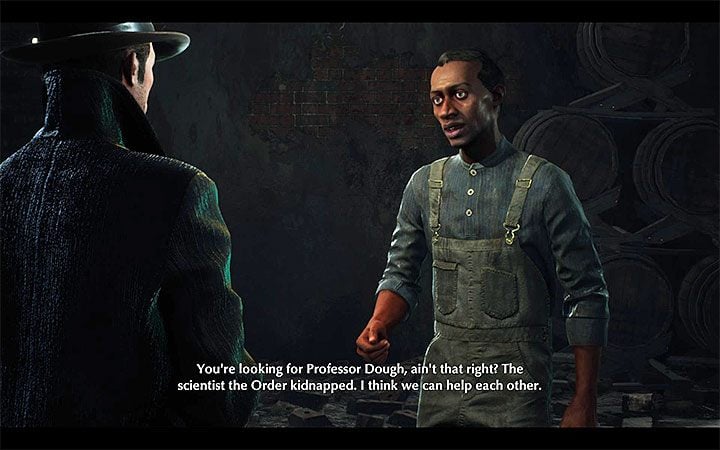
You meet Fred regardless of the option you chose:
In both cases, you will learn that Fred can help Reed find the missing Harriet Dew, if the hero will first do him a favor and help get out of town.
Before you help Fred returning to Throgmorton Manor, report to Robert Throgmorton. You will receive a prize – XP, ammunition, and a Shotgun.
A new main investigation will start immediately – Fathers and Sons