
Last update: 08 July 2019
On this page of the Tipps to The Sinking City, you will find a walkthrough for the main case Fleeing Phoenix. As part of this investigation, the protagonist must search for an interview a local archaeologist. During the course of the mission, an unexpected undead priestess will appear. You will have to make an important decision about how to behave towards these two important characters.
- Meeting with Joseph hill and examining his apartment
- Searching for the „vampires“ report
- Investigating the alley – crime scene
- Searching Raymond’s room at Devil’s Reef hotel
- Visiting the Hidden Lab
- The first conversation with Usha
- Finding the diving site in the cemetery.
- Option 1 – Murdering only Usha
- Option 2 – murdering only Joseph
- Option 3: Murdering both Usha and Joseph
Meeting with Joseph hill and examining his apartment
This case starts automatically after the completion of the investigation Self-Defense. You will immediately have Buried Secrets trail and The Seal of Cthygonnaar object. Soon after the start of this investigation, you will also unlock the King’s Robes – these are new clothes that you can wear when you open the wardrobe in the hotel room.
The first action you must complete during this new case is visiting the residence of Joseph Hill, the archaeologist. It is shown in the attached picture – it’s a house on Lambert Street, in Reed Heights district. It’s located between Healog Street and hale Lane.
Examine the corpse that you will notice immediately after entering the building. Go down to the basement. There you can find three more bodies to examine and a corpse of a monster. Once you spend enough time in the basement, new monsters will appear there. Once you deal with them, find a first aid kit and take the minor loot from two cabinets.
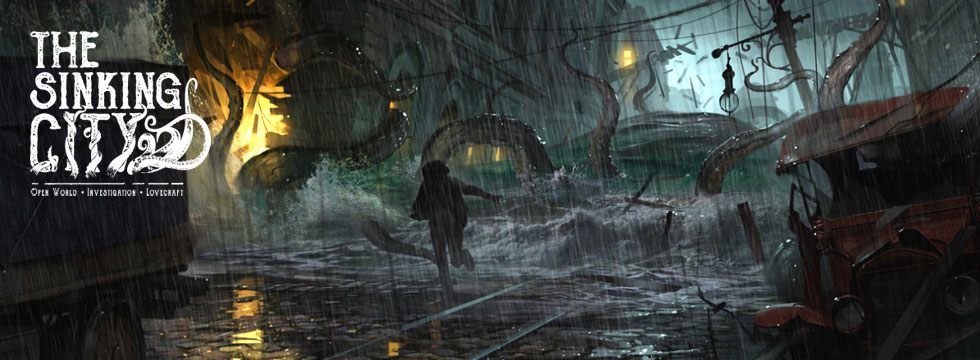
You can climb the furniture shown in the picture and sneak into the apartment on the first floor. Here you will find A Letter from the Landlord, a body of a man in a white suit, and a container with some minor loot. The exit from the apartment is barricaded, so go back to the starting point the same way.
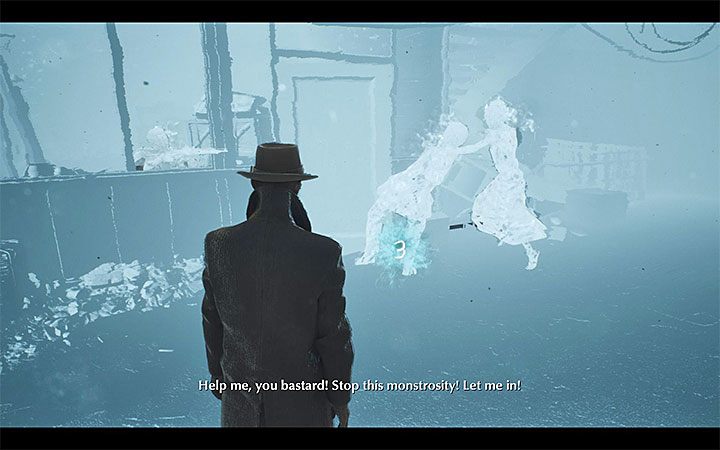
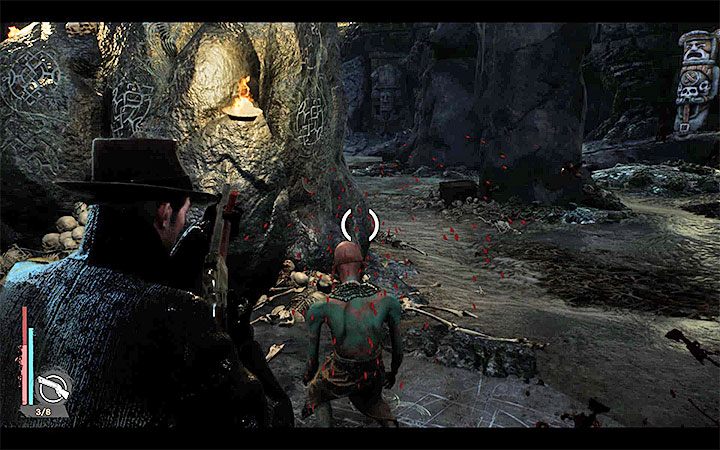
This time, use the stairs leading to the first floor and open a new container with a minor lot. Immediately after entering Hill’s apartment, a hostile Usha priestess will start moving towards the protagonist. Withdraw back and fire at her at the same time. Once you defeat her, you will unlock a trail about the Undead Maya.
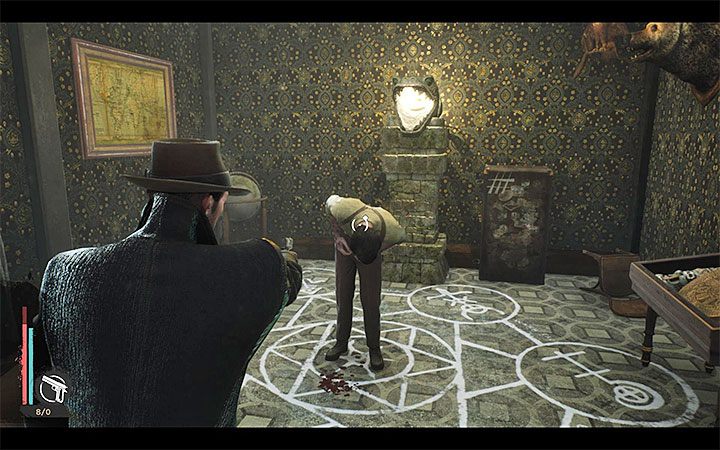
Go back to your apartment and talk to Joseph Hill, who is standing in a magic circle. Use all possible dialogue options. You will unlock a trail Hill’s Request. Now, explore Hill’s apartment:
Hill’s apartment is investigated in 100 percent.
Searching for the „vampires“ report
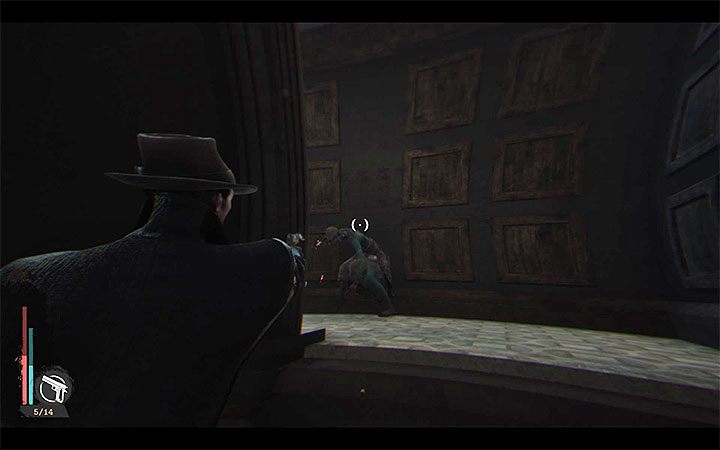
It’s time to visit the Oakmont Police Department, or rather its archive:
By setting the search criteria correctly, you will find a report about the Bloodless Corpses.
Open the Mind Palace. Connect the clues A so-called „vampire“ has killed people and Usha needs blood to become stronger – you will unlock deduction Usha is an insatiable murderess.
Investigating the alley – crime scene
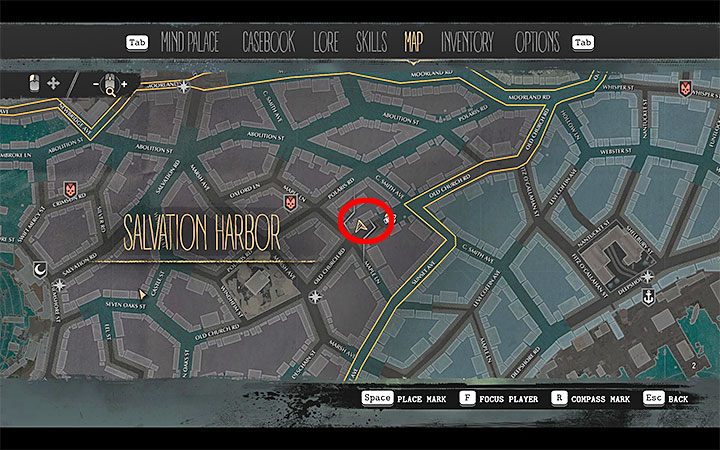
Your destination is a crime scene in the Salvation Harbor district. You need to reach the Backyard Crime Scene alley on Old Church Road. It’s located between C. Smith Avenue and Maple Lane. The location is shown in the attached picture. Once you reach the area, you will recognize the alley thanks to the police barriers.
After entering the alley, expect some monsters to appear. Among other creatures, there will be a large monster. It is not recommended to fight him in the narrow space. However, after leaving the alley you must watch out so that you don’t scare any civilians.
Once you get rid of the monsters, examine the alley:
A retrocognition should start right away. Here is the correct order of events:
You will determine that Usha attacked a group of men and they couldn’t defeat her. The priestess hypnotized Survivor Raymond so that he listened to her commands. Open The Mind Palace. Connect the clues Usha hypnotized Raymond and A bag with a letter – you will unlock the deduction Raymond’s whereabouts.
Searching Raymond’s room at Devil’s Reef hotel

Return to the Devil’s Reef Hotel and talk on the ground floor with the owner about Raymond’s Dwelling. Go to the second floor. Raymond’s room is located next to Reed’s room (it’s on the left). You need to examine the following areas:
The hotel room was examined in 100%.
Visiting the Hidden Lab

The next step is to reach the Hidden Lab. The description of this location in Raymond’s journal does not offer a full set of information about the location of the laboratory. It is located in the place shown in the picture – in the flooded Moorland Road, which is located on the border areas of districts Shells and Salvation Harbor. More specifically, you must reach the area between C. Smith Avenue and Powderhouse Street.
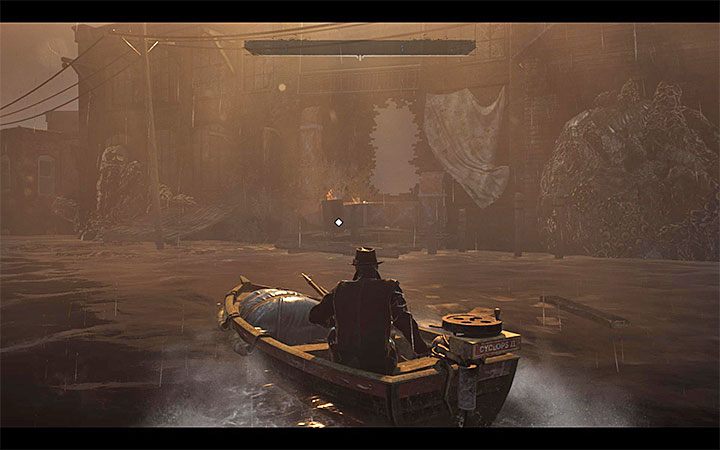
In order to enter the lab, you need to use a boat. The place where you can dock the boat is shown in the picture. Make sure you choose the right place because there is also a house nearby that is not related to this investigation.
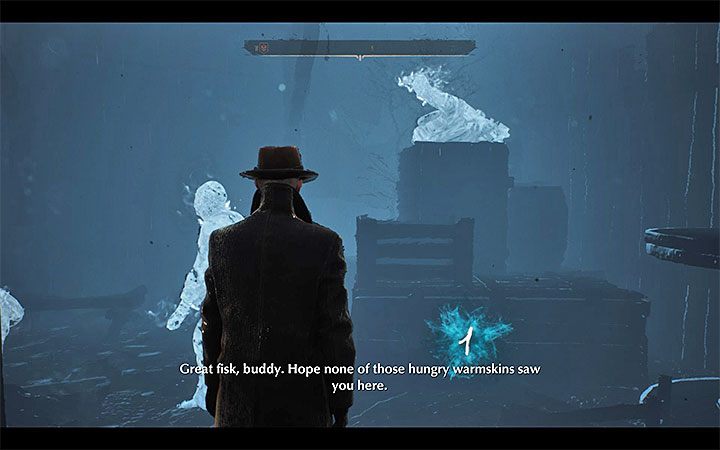
Expect some monsters to appear soon after you enter the laboratory. It is a good idea to retreat to the exit from the building. Monsters will not be able to jump over the wall that separates the laboratory from the pier. You can shoot from a safe place or, for example, throw a grenade inside.
Once you get rid of all the creatures, examine the laboratory:
A blue cloud should appear in the hidden laboratory – you can start the retrocognition. Below you can find the correct chronological order of events:
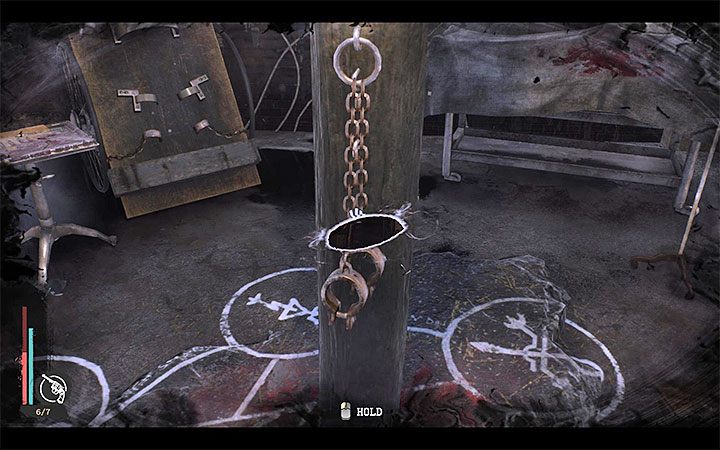
You will determine (Secret of the Alchemy Lab) that Joseph Hill and Raymond were torturing Usha and that they were unsuccessfully trying to get information from her. Usha managed to free herself. Hill escaped to the room on the ground floor. However, Usha managed to get Raymond.
The first conversation with Usha
A conversation with Usha controlling Raymond’s body will start. Use all available dialogue options. At the end of this conversation, new dialogue options will appear. You will be able to agree to murder Joseph or to refuse her (above picture). This decision isn’t final yet. You will be able to decide whose side are you on later during this case. You will discover a new trail – Usha’s Proposal.
Open the Mind Palace:
Depending on which deductions you choose, there are three possible conclusions:
We remind you that you aren’t making the final decision yet. Your actions after you leave the hidden laboratory will determine which of the three options will be selected.
Finding the diving site in the cemetery.

Before you make the decision on how to act, you should find the diving area that leads to Usha’s hideout. Cemetery (St. Botolph’s Cemetery) is located in the southwestern part of the Reed Heights district. You have to get there by boat. Once you reach the cemetery, take interest in the longitudinal crypt marked in the above picture. Inside it, you will find a diving suit. You can’t use it yet – first you must choose how you will behave.
Option 1 – Murdering only Usha
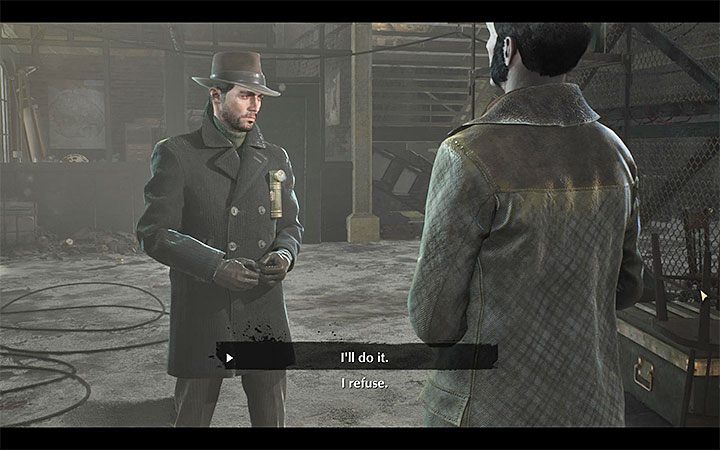
Go back to the Residence of Joseph Hill and report to him. During the conversation with Joseph, express a desire to kill Usha. You don’t need to be careful while selecting dialogue options – none of them leads to combat.
You will receive the Mystical Ointment from your interlocutor. You can use it after delivering a fatal blow to the priestess.
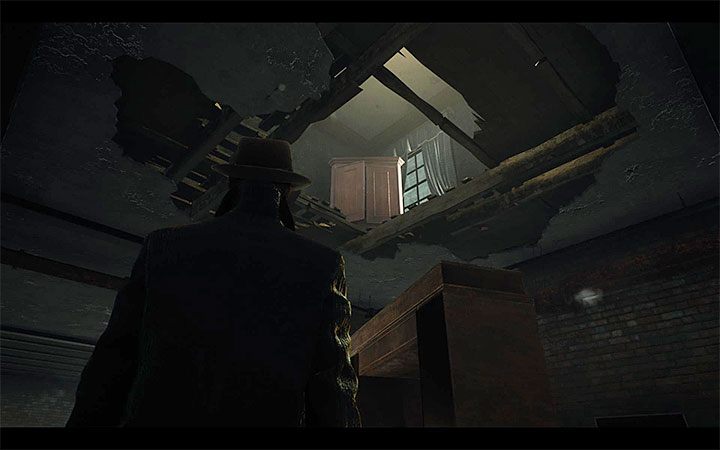
Once again, reach St. Botolph’s Cemetery. If you interact with the diving suit in the crypt, this time it will make you dive. Once you’re on the bottom of the sea, try moving without staying in one place for too long as the protagonist will be gradually losing his sanity (the blue bar). Watch out for the hot air and pass through when it isn’t present. On the way, you will get to the statue. Touch it and then use the Mind’s Eye. Let the symbols match. The illusion will disappear and you will be able to pass on.
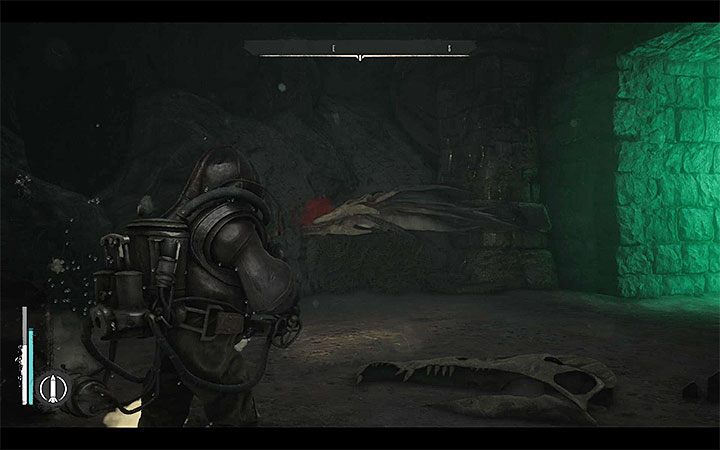
Beware of the underwater monster during the final phase of the walk (image above). There’s a good chance he’ll attack Reed. Use the harpoon before the creature swims up and quickly go to the nearby entrance to the underwater cave.
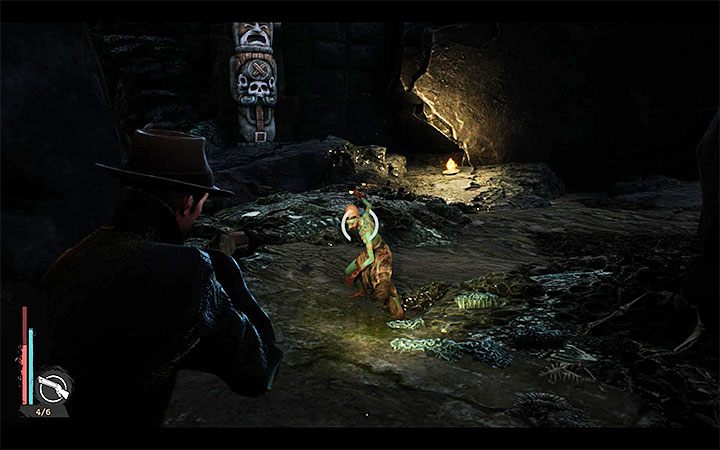
If you need ammunition or treatment, take care of it immediately after leaving the suit. The meeting with Usha will take place shortly after entering the cave. Be ready to start the battle immediately – Usha knows that Joseph is still alive. Here are some tips related to this fight:
Once you win, you will automatically obtain Usha’s Ashes and you will earn The End Justifies the Means trophy/achievement). Use the diving suit. Joseph Hill will be standing outside the crypt. You can talk to him immediately. He will invite Reed to a Meeting in Hill’s Lab in the Hidden Lab. Go there.
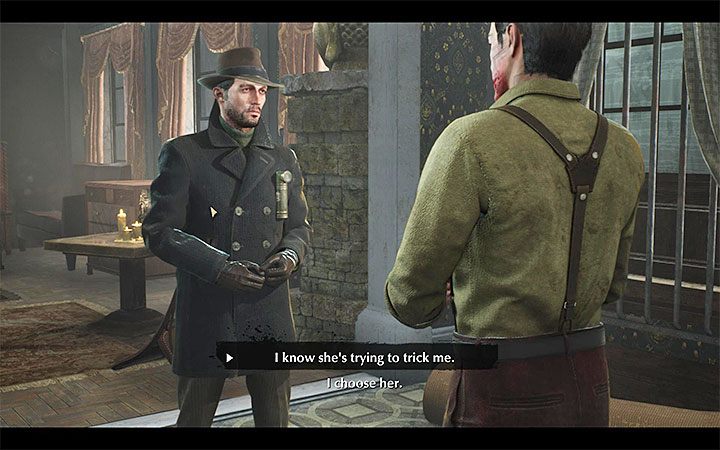
You will find Joseph in the place where Usha was imprisoned. Complete a long conversation – you will learn how to enter Cthygonnaar. Be careful when selecting options presented in the picture. Don’t choose the bottom one as it would trigger a fight with Hill. The final case, Into the Depths, will unlock.
Option 2 – murdering only Joseph
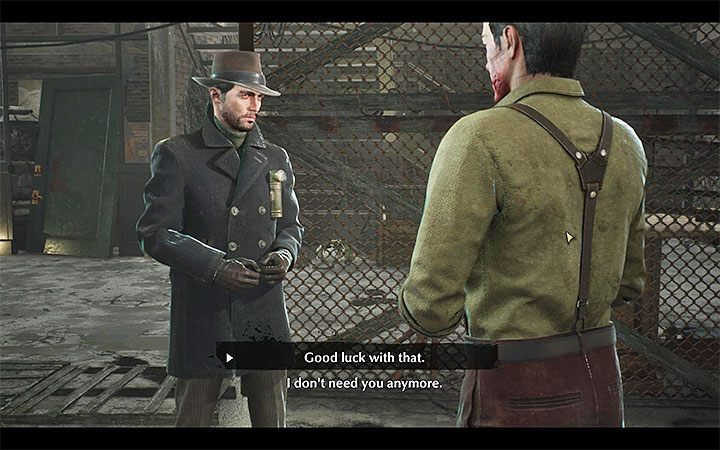
Go back to the Residence of Joseph Hill and report to him. During the conversation with Joseph, tell him that you will choose priestess‘ side. Joseph won’t attack Reed first. You must shoot him with any weapon. Shoot Joseph to unlock Still Salty achievement/trophy).
Despite the fact that you murdered Joseph Hill, you will find Mystical Ointment. It won’t be useful in option 2 that is described here. It is useful in option 3 in which you eliminate both NPCs.
You will meet Usha while leaving the building. Once again, she will be controlling Raymond’s body. Despite the fact that you fulfilled her wish, you must still meet with her in the underwater cave.

Once again, reach St. Botolph’s Cemetery. If you interact with the diving suit in the crypt, this time it will make you dive. Once you’re on the bottom of the sea, try moving without staying in one place for too long as the protagonist will be gradually losing his sanity (the blue bar). Watch out for the hot air and pass through when it isn’t present. On the way, you will get to the statue. Touch it and then use the Mind’s Eye. Let the symbols match. The illusion will disappear and you will be able to pass on.
Beware of the underwater monster during the final phase of the walk (image above). There’s a good chance he’ll attack Reed. Use the harpoon before the creature swims up and quickly go to the nearby entrance to the underwater cave.
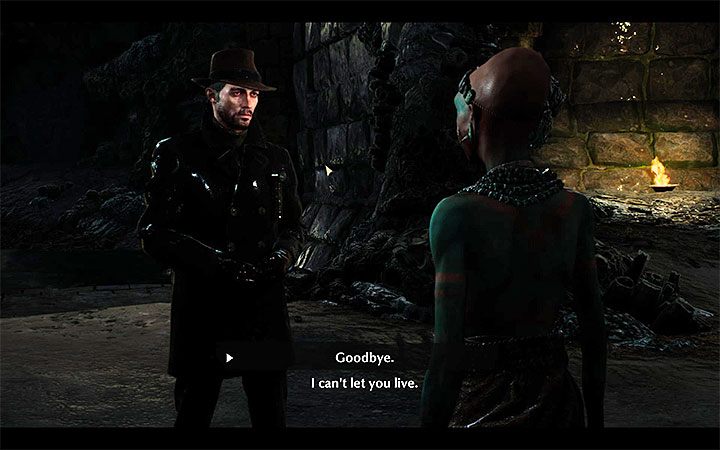
The meeting with Usha will take place shortly after entering the cave. Use all available dialogue options and you will find out how to get to Cthygonnaar. Finally, select the upper dialogue option to finish the conversation (above picture). The bottom option will trigger a fight.
The final case, Into the Depths, will unlock. You can immediately get to the suit to return to the surface.
Option 3: Murdering both Usha and Joseph
This option is an expanded version of both options described above. By default, only one of the NPCs must die so you can unlock the game’s last major mission. However, if you want, you can kill both characters. The death of Usha and Joseph won’t foil your plans. Before you perform the second murder, you will determine how to enter Cthygonnaar and the Into the Depths quest will be added to your journal.
You can, of course, murder Usha by following the instructions presented in Option 1. There is also an alternative way – you can murder her after you kill Joseph and you meet with her in the underwater cave. It is not recommended to provoke her into a fight during this conversation. It is better to pretend that you’re on her side until the end. Then you can easily shoot her (above picture). This will enable you to avoid having to participate in a regular battle with her. If you „cheat“ Usha in this way and you kill her when she can’t defend herself, you will unlock Dodge This trophy/achievement.
Joseph can be killed by playing as described in option 2. You can also attack him after you deal with Usha, during the final meeting with him in the Hidden Lab.