
Last update: 02 February 2021
Key points of Immortals Fenyx Rising – Grove of Kleos – Chests
Chests
Guarded Chests
Night Chests
Epic Chests
This page of the Tipps to Immortals Fenyx Rising contains a map showing the locations of all chests, divided into normal, epic, guarded and night chests, within the region of the Grove of Kleos.
In this zone you will find 8 normal chests, 7 guarded chests, 2 night chests, and 14 epic chests. Normal chests usually contain crystals and fruits/mushrooms, while other, more unique chests can yield new weapons and armour, as well as skins for the aforementioned equipment.
- Normal chest – house [1]
- Normal chest – stone platform [2]
- Normal chest – Myth Challenge [3]
- Normal chest – near a destroyed bridge [4]
- Normal chest – underwater cave [5]
- Normal chest – hill with a lone tree [6]
- Normal chest – Athena’s Sanctuary [7]
- Normal chest – 3 crystal switches [8]
- Guarded chest – Griffin [1]
- Guarded chest – Minotaur [2]
- Guarded chest – soldiers [3]
- Guarded chest – Minotaur and harpies [4]
- Guarded chest – Chimera [5]
- Guarded chest – Minotaur with soldiers [6]
- Guarded chest – remote island [7]
- Night chest – Cyclops [1]
- Night chest – Cerberus [2]
- Epic chest – corrupted crystals [1]
- Epic chest – two targets and lasers [2]
- Epic chest – laser room [3]
- Epic chest – blocks and pressure plates [4]
- Epic chest – blocks and red barriers [5]
- Epic chest – heavy block [6]
- Epic chest – 3 targets and 3 blocks [7]
- Epic chest – blocks and pressure plates [8]
- Epic chest – corrupted crystals on columns [9]
- Epic chest – a deep dive [10]
- Epic chest – ruins and a lever [11]
- Epic chest – near Athena’s Sanctuary [12]
- Epic chest – block throwing [13]
- Epic chest – distant island [14]
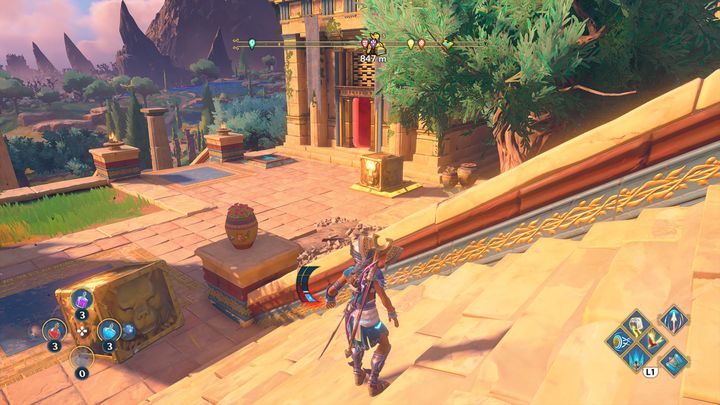
Normal chest – house [1]
This normal chest is located near a small house, which has distinctive orange stripes at its bottom.
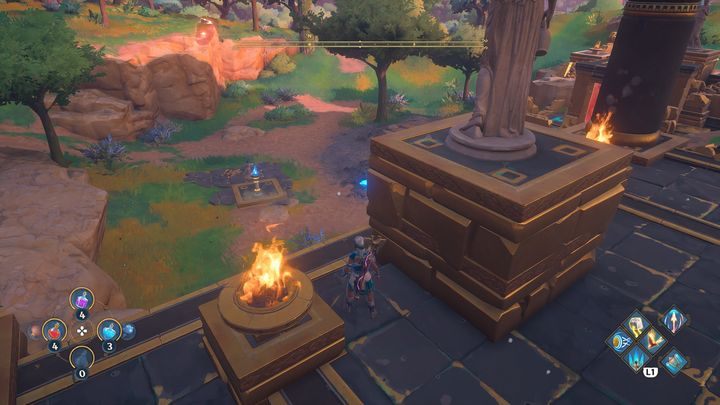
Normal chest – stone platform [2]
The chest is located on a stone platform, with two braziers on its left and right sides. Walk up the stairs and open the chest.
Normal chest – Myth Challenge [3]
The chest becomes available immediately after you solve the Myth Challenge. To do this, stand on the platform with a soldier’s helmet symbol, and point the camera towards the statue. Afterwards, use Apollo’s Arrows and fire to light two torches.
This will cause the red barrier to disappear. After that, destroy the cracked wall that is obstructing your path and place a block on the pressure plate with a forge symbol. This will remove another barrier. Head straight for the chest.
Normal chest – near a destroyed bridge [4]
This chest is located near a destroyed bridge, next to a column. Beware of enemies such as wild boars and bears, as they can be found very close to the bridge. Sneak in and open the chest or get rid of your opponents in a more direct fashion.
Normal chest – underwater cave [5]
The chest can be found in an underwater cave. The white glow that appears on the surface of the water will show you the way.
Normal chest – hill with a lone tree [6]
This particular chest is located near the statue of the Goddess of Wisdom, on a hill on which there is a solitary tree.
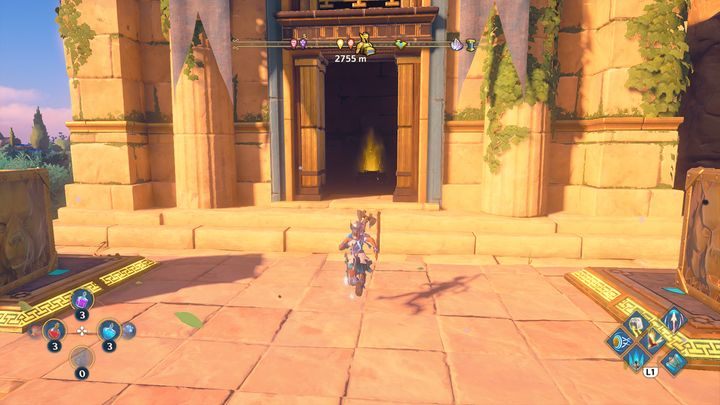
Normal chest – Athena’s Sanctuary [7]
The chest can be found behind Athena’s Sanctuary. It can be quite tricky to spot since it is located behind a small object with food on it.
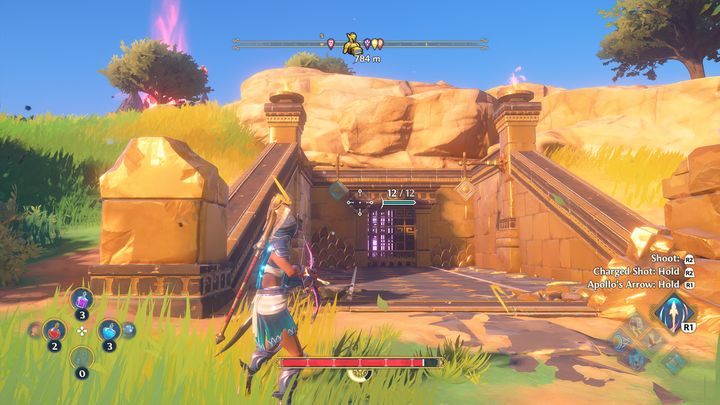
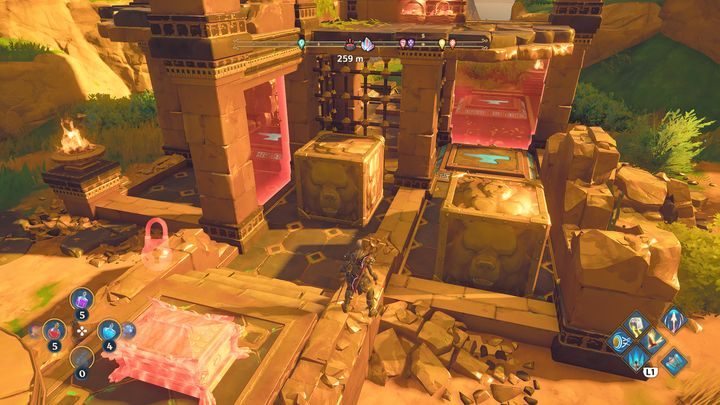
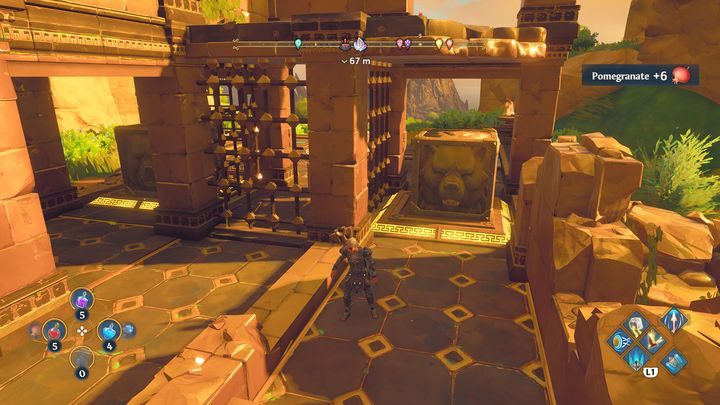
Normal chest – 3 crystal switches [8]
Firstly, near the platform on the left, there is a slightly damaged wall; tear it down, and then step onto the platform with a soldier’s helmet symbol. Use the Godly Power of Heracles‘ Strength to throw a block into the hole, which is located opposite the building.
Then repeat this step and throw a block into the hole on the left side of the building. If the crystal switch does not activate, throw a block into the hole on the left again. Once it has been activated, approach it and interact with it.
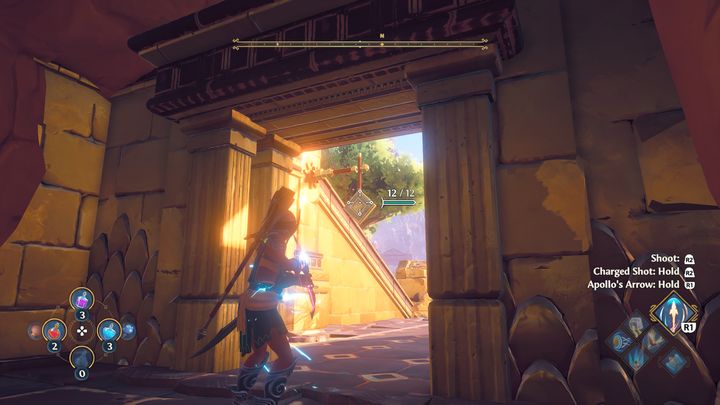
Afterwards, on the left side in the middle of the room, you will find several opponents; defeat them and then destroy the corrupted crystal. Go upstairs and fire an Arrow of Apollo towards the fire and then towards the torch. This will unlock another crystal switch.
The next step is to place the blocks on the pressure plate. When you have placed all three correctly, take one of them to the fourth platform, which is located outside. Activate the third switch and head inside to open the chest.
Guarded chest – Griffin [1]
This chest is mainly guarded by two Gorgons and a Griffin. The best way of approaching this fight is to do deal with the Gorgons first, and focus on the Griffin at the very end.
Guarded chest – Minotaur [2]
This location is defended by Gorgons, a Minotaur and a few soldiers. It is a good idea to try to gather your opponents in one place and then attack with an axe in order to quickly stun them.
Guarded chest – soldiers [3]
This chest is mainly guarded by a few soldiers and a Gorgon. You can quietly sneak up on each of them and perform a stealth attack.
Guarded chest – Minotaur and harpies [4]
The chest is protected by a Minotaur and two harpies. Take care of the harpies first, avoid fighting the Minotaur until the other foes are dealt with.
Guarded chest – Chimera [5]
This location is full of enemies such as harpies, Gorgons, and even a Chimera. The most straightforward strategy is to focus on the Chimera, and simply watch the other enemies and react to ranged attacks with perfect dodging or parrying.
Guarded chest – Minotaur with soldiers [6]
The Minotaur is surrounded by several lesser foes; it is worth focusing on the soldiers first, you should only deal with the Minotaur when he is the last one standing.
Guarded chest – remote island [7]
The chest can be found on a remote island. It is guarded by several soldiers, Gorgons and a Minotaur.
Night chest – Cyclops [1]
The night chest (which is only accessible at night) is guarded by Gorgons, harpies and a Cyclops. The best way to approach this fight is to take care of the harpies and Gorgons first and leave the Cyclops for later since he is slow and can be a huge threat when engaged directly. Aim for the eye by default!
Night chest – Cerberus [2]
The second night chest is as well protected as the previous one, as you will have to overcome a Cerberus, harpies and several soldiers. Deal with the soldiers and harpies first, then confront the Cerberus.
Epic chest – corrupted crystals [1]
Go to the point indicated on the map above. Once there, you will encounter some difficulties due to a large number of opponents. After you have defeated them, destroy the corrupted crystals that are on the same level where the fight against your opponents took place; you will find more crystals up top, you can reach them by taking the stairs.
By destroying the corrupted crystals, you will unlock access to heavy blocks. Simply transport them to the pressure plates that are located near the red barrier.
Once you have all the blocks in place, head inside and unlock the chest. You will find a helmet skin inside.
Epic chest – two targets and lasers [2]
There are several opponents here, deal with them first and then try to solve the puzzle. There will be two targets directly in front of you. The target on the left side unlocks the first door, while the target on the right side unlocks the second, further door. Remember, after you shoot at one of the targets, the effect of the other one will deactivate.
Shoot at the target on the left first and go inside, then shoot at the second target to close the first door and unlock the next.

After you open the door, watch out for the lasers. Firstly, jump over a laser, and then proceed through the room while avoiding contact with any of the lasers, the chest is located at the end of the corridor. You will find a new helmet in the chest. After opening the chest, use the switch located nearby in order to turn off the lasers.
Epic chest – laser room [3]
Simply enter the room where the chest is located and destroy the walls on the left side. Afterwards, you will see a large number of lasers around you. Shoot the target, which is located behind bars; if you do this successfully, you will gain access to a small block. You can use the block to protect yourself from the laser beams.
Use it every time you manage to proceed a little further in order to block the next lasers. You will find a new helmet in the chest.
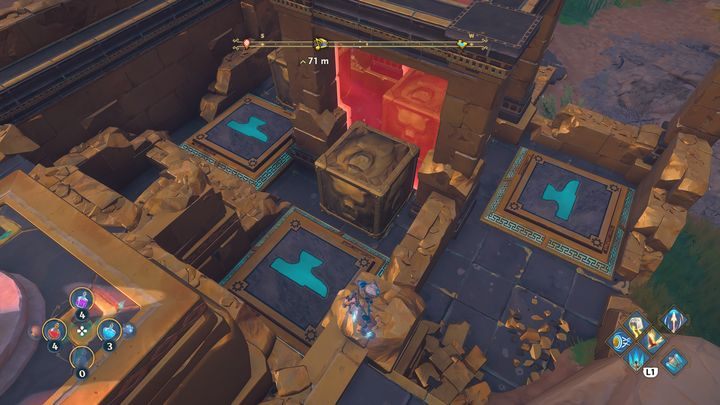
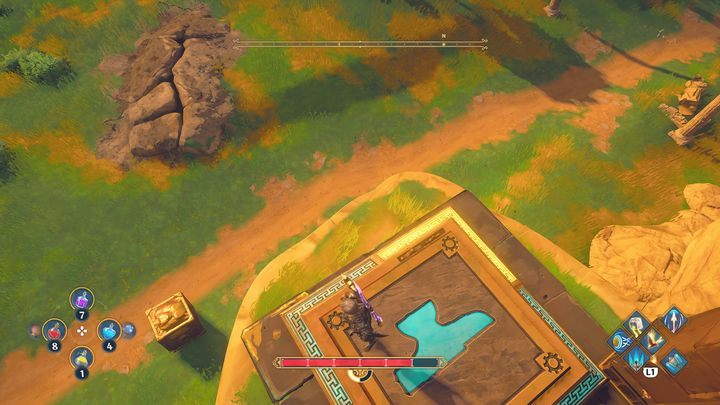
Epic chest – blocks and pressure plates [4]
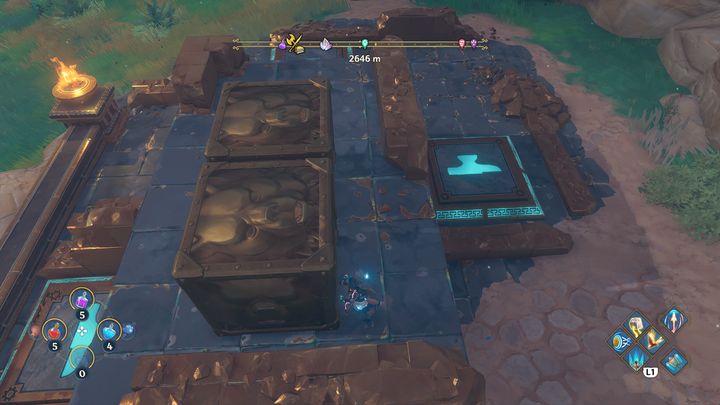
This is one of the easier puzzles to solve. Simply drop the first block to the left, then jump down and move the next block onto a pressure plate on the right; at the very end, jump up and drop the last block onto another pressure plate in front of you. Once you have done that, the chest will be unlocked in a nearby cave. The reward is another helmet.
Epic chest – blocks and red barriers [5]
This puzzle also revolves around placing blocks on pressure plates, it too, is very simple. Each block that is correctly placed on a platform neutralizes the red barrier. When you use one of the blocks, leave it in its current position and move to another, then when the second block is on the next pressure plate, go back to the first one and push it further.
When the blocks are on the final switches, you will unlock the chest, and inside you will find new armour.
Epic chest – heavy block [6]
Go to the point indicated on the map above. At the top, there is a small hill on which you can see a platform. In order to unlock the chest, you need to bring a large block to the platform. However, this feat requires an upgrade of the Godly Power of Heracles‘ Strength, which will allow you to move such heavy blocks.
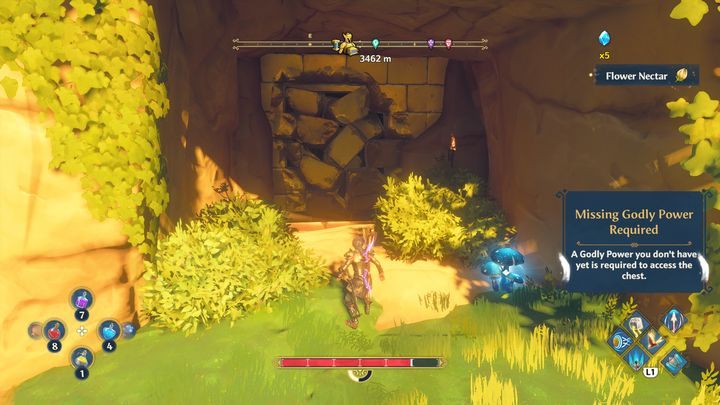
If you have the upgraded power, there is a wall below that you can destroy. Go ahead and destroy the wall, that is where the block is. Afterwards, drop the block on the pressure plate and open the chest.
Epic chest – 3 targets and 3 blocks [7]
Firstly, you need to activate the levers and shoot down all the targets; when you do, the crystal switch will be activated. Get to its location and interact with it. Afterwards, destroy the wall near the lever and pick up a small block.
Put it on the pressure plate on the right. After that, inside the building, behind bars, you will see another small block. Move it onto the switch with a feather symbol by using your Godly Power while going to the left. This will create another small block, which you should put where you have placed the first block. Then go to the switch, activate it and open the chest. Inside it you will find a new helmet.
Epic chest – blocks and pressure plates [8]
The most important thing you need to know when completing this puzzle is that you do not have to put weight on all of the pressure plates. Take care of the right side by placing blocks or stones on the platforms; after you do this, a crystal switch will appear.
Activate it and take care of the left side. Remember, that for pressure plates with a feather symbol, you only need something light, such as a stone, and for those with a forge symbol, you need heavier blocks. You can also find one near the destroyed wall. Once you have placed the blocks correctly, activate the next switch and go inside. There is another helmet in the chest.
Epic chest – corrupted crystals on columns [9]
Go to the point indicated on the map above. You will see a building there, there are two columns on the left and right side of the building, with…